For our friends who aren’t on Facebook, here is our latest Virtual Field Trip. This time we talked all about eggs.
Please post any questions below in the comments.

For our friends who aren’t on Facebook, here is our latest Virtual Field Trip. This time we talked all about eggs.
Please post any questions below in the comments.
With schools closed because of the Covid-19 virus, we decided to host a Virtual Field Trip to complement any learning your children are already doing from home. We broadcast the field trip live on Facebook Friday, March 20th, but also wanted to post it here for anyone not on Facebook.
We hope you enjoy this, and please post any questions you have in the comments below.
We will be hosting another virtual field trip on Wednesday, March 25th live on Facebook at 1pm EDT. The topic of this broadcast will be Eggs.
Continue reading
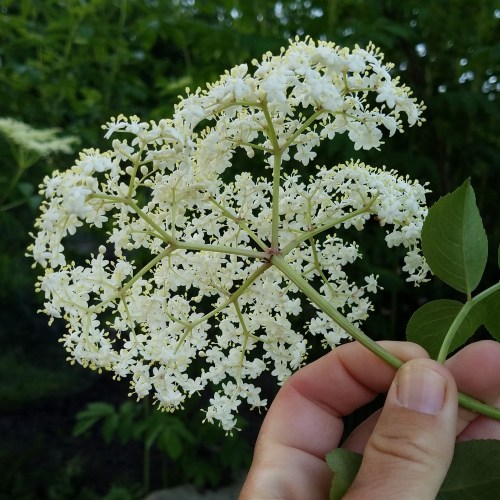
Elderflowers are in bloom and are available for purchase!

Elderflowers grow on an umbel (a flower cluster in which stalks of nearly equal length spring from a common center and form a flat or curved surface) and can be used to make jellies, syrups, cordials and liqueurs. They can also be made into fritters or dried for teas.
All elderflowers are picked to order and we require at least 1 day’s notice (no same-day pick-ups). We are unable to offer shipping on elderflowers.
Prices are:
$1/umbel up to 50
$.90/umbel 51-75
$.80/umbel 76-100
$.75/umbel over 100
Email, call, message on Facebook, or contact us here to order.
My niece gets eczema-like flakiness on her scalp. It was originally diagnosed as cradle cap, but when the condition persisted into her toddler years and didn’t respond to cradle cap treatments, my sister suspected a dairy allergy. A couple weeks after removing all dairy from her diet, my niece’s scalp wasn’t dry and flaky anymore.
This spring I experimented with making dairy-free desserts for my niece. Two were big hits with our whole family, the other, was good but not great. I have an idea of how to make it better, though.
On Hannah’s birthday I made a dairy-free Chocolate Chip Skillet Cookie in addition to her birthday cake. I found the recipe for a CC skillet cookie via Pinterest, tweaked it a bit and Viola!
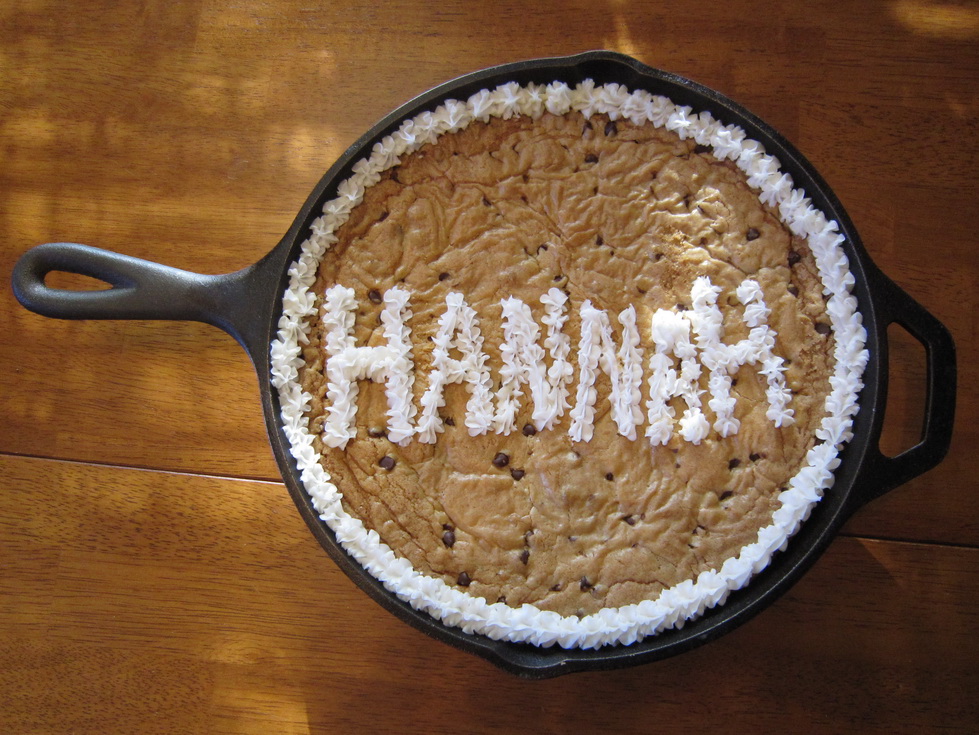
Here’s my version of the recipe:
Ingredients:
1 ¾ c white whole wheat flour (King Arthur’s)
½ tsp baking soda
14 tbsp Earth Balance
½ c granulated sugar
3/4 c packed dark brown sugar (I used light brown)
1 tsp salt
3 tsp vanilla extract
1 large egg
1 large egg yolk
1 ¼ c Enjoy Life semi-sweet chips
Directions:
Heat oven to 375 degrees. Adjust oven rack to middle position. Lightly butter pan.
~~~~~~~~~~~~~~~~~~~~~~~~~~~~~~~~
For St. Patrick’s Day, I made the Coconut Oil Fudge recipe that I found on Common Sense Home blog. It was good, but I didn’t add the nuts or dried fruit in the recipe and you could really taste the coconut oil.

I think if I make it again I will use a neutral taste coconut oil like Jarrow’s and add the nuts and/or dried fruit. Here’s the recipe:
Ingredients
2 c unrefined coconut oil, softened
¾ c finely chopped nuts
1 c organic cocoa powder
7 tbsp maple syrup or honey
¼ c chopped dried organic cherries or dried, unsweetened coconut
¼ c chopped dried organic cranberries
Directions:
In the bowl of a standing mixer stir coconut oil until creamy with no lumps (if oil is too thick, set bowl in warm water). (You want the oil soft, not liquid. If it is liquid, the other ingredients will settle to the bottom of the pan instead of staying mixed with the oil. If this happens, you can warm the whole thing and remix.) Add cocoa powder and sweetener, mixing after each ingredient. Mix in the dried fruit, (coconut), and nuts.
Spread fudge into 7″x11″ or 9″x9″ inch pan and refrigerate or freeze until firm. Cut into squares and serve. Keep refrigerated.
~~~~~~~~~~~~~~~~~~~~~~~~~~~~~~~~
What Easter basket is complete without chocolate? My very favorite are buttercreams. I decided to make dairy-free buttercreams for my niece for Easter and they were fantastic! For the filling I used this Irish Potato recipe from Cooks.com, minus the coconut (yes, Irish Potatoes are buttercreams plus coconut and rolled in cinnamon).

Recipe:
1 lb 10x sugar
1 stick Earth Balance
½ tsp salt
1 tsp vanilla
1/3 c light Karo
1 bag Enjoy Life semi-sweet chips
Directions:
Mix ingredients by hand or in mixer. When combined put in refrigerator for at least 2 hours. Melt Enjoy Life chips in double boiler. Scoop filling with spoon or cookie dough scoop and roll in melted chips. Remove and place in paper candy cups or on wax/parchment paper. Refrigerate until set and store in refrigerator. Note: the filling warms easier and faster that true buttercreams so you may need to work in small batches so it doesn’t get too soft to work with.
I’m already looking for summer desserts that I can make for my niece and can’t wait to share them with you!
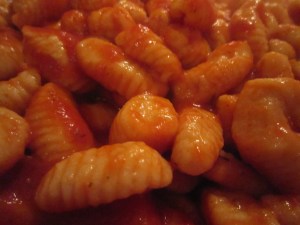
Gnocchi can be made 2 ways… with potato or Ricotta cheese. I use my grandmother’s recipe to make mine and use Ricotta.
What you’ll need:
3 lbs Ricotta Cheese
2lbs+ Flour (you’ll need to add more than 2 lbs so that the dough isn’t sticky and also for rolling the dough)
3 eggs
handfull of parmesan (I use Locatelli instead)
Gnocchi boards or forks

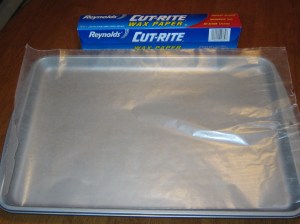
Step 1 – Put wax paper on cookie sheets.
Step 2 – Measure out ingredients and make “well” in center of flour.


Step 3 – Mix together eggs, Ricotta and parmesan.

Step 4 – add wet mixture to well in flour and knead dough (don’t over-knead or the dough will become tough).


Step 5 – Wet a towel with water, wring it out and cover dough so it doesn’t dry out. Cut of small amount of dough off.
 Step 6 – Roll into long “rope” and cut into small pieces.


Step 7 – Roll pieces of dough on gnocchi boards or forks.
Step 8 – Freeze gnocchis on cookie sheets then put into freezer bags (you can also cook the fresh gnocchis).
Step 9 – Cook in boiling water until they all float. Serve in a dish with gravy (we don’t call it sauce!) and enjoy!
My mom-mom was a little Italian woman who could make anything. Crafts, cooking, baking … you name it, she could do it. Every Sunday our family would gather at Mom-Mom’s and Pop-Pop’s house for dinner. Almost always a homemade Italian meal. The only exceptions were the dog days of summer when Pop-Pop would grill.
All of us grandkids helped make spaghetti, ravioli, gnocchi, manigot (manicotti), lasagna … and meatballs. I’ve promised a lesson on making gnocchi, but today we’re talking meatballs. Mom-Mom’s meatballs were famous. She’d never make less than 50 at a time, and more often would make 100-200. She’d sell meatball sandwiches each year at the church’s June bazaar, along with fresh-squeezed lemonade, and people would flock to her booth.
Mom-Mom never measured ingredients and didn’t have a recipe for her meatballs so trying to replicate them was not always easy. She had it all in her head, but we kept asking for a written recipe. Thanks to our dear friend, Melba, we got one. One day when Mom-Mom was making her meatballs Melba was visiting. She took a pen and paper and wrote down everything Mom-Mom put in the mix. Every time I make meatballs, I think of my mom-mom. I also think of Melba and how grateful I am for the recipe in my hands, because it’s more than measurements – it’s a connection to wonderful memories.
Now to the recipe and the lesson!
What you’ll need:
5 lb ground beef (I use 80% lean)
2-1/2 cups breadcrumbs (or 1/2 cup per lb of meat)
5 eggs (or 1 egg per lb of meat)
garlic powder, parsley, basil, grated locatelli cheese, salt, pepper, italian seasonings to taste.
Step 1
Spay a baking pan with olive oil Pam or rub with olive oil. Turn oven on to 350 degrees.

Step 2
Mix ingredients in a large bowl by hand. (I suggest that you remove any rings) Instead of salt and pepper I like to use Nature’s Seasons (bottle with blue cap). Be gentle while you mix the meat or your meatballs will be very dense.

I forgot to put the bread crumbs in the photo above!

Step 3
Roll the meat into meatballs. Try to keep them somewhat uniform in size so they cook at the same rate. Also, don’t pack them while you’re shaping – they’ll end up too dense.

Step 4
Bake in your preheated oven for 30-45 minutes, or until browned.

Step 5
Now they’re ready to eat, add right to your spaghetti gravy (no, we don’t call it sauce in our home), or cool and freeze. Any juices in the pan can also be added to the gravy or frozen for future use. Don’t throw them away … I believe Marie on the TV show Everybody Love Raymond called those juices liquid gold!
I hope you enjoy making and eating these meatballs as much as I do!


